Where The Lone Star State Meets The Puget Sound
A Fine Mesh Of Two Great Styles

Saturday, December 22, 2012

Lighted Garland


It is often said that imitation is the most sincere form of flattery.  The idea for this raggy lighted garland did not originate with me but rather with Holly Browning, the creative and talented author of 

Please spend some time browsing Holly's first-rate blog.  I am always so inspired by her home decorating genius.


I am so fortunate to have an electrical outlet strategically placed just above the mantle.  Could it be that the original builders of our house were thinking about Christmas when they did the wiring? The house was built by the original owner himself in 1952.  I have had many houses during my 31 years of marriage but this is the only one with this cherished feature.


This was not a quick project by any means but I have to say that it was extremely gratifying.  I used a strand of white lights on white cord and a ton of muslin of high quality that I found at a thrift store.  The look was created by tearing the muslin into strips 1.5" wide.  I then cut the strips into 7" lengths.  Each strip was lovingly tied onto the strand of lights.  You can find complete directions at Holly's blog.

Once again my Pottery Barn reindeer, which were gifts from my parents in 1993, are standing guard above our stockings.  They are looking as regal as ever!  Fortunately the candles are still available on Pottery Barn's website.


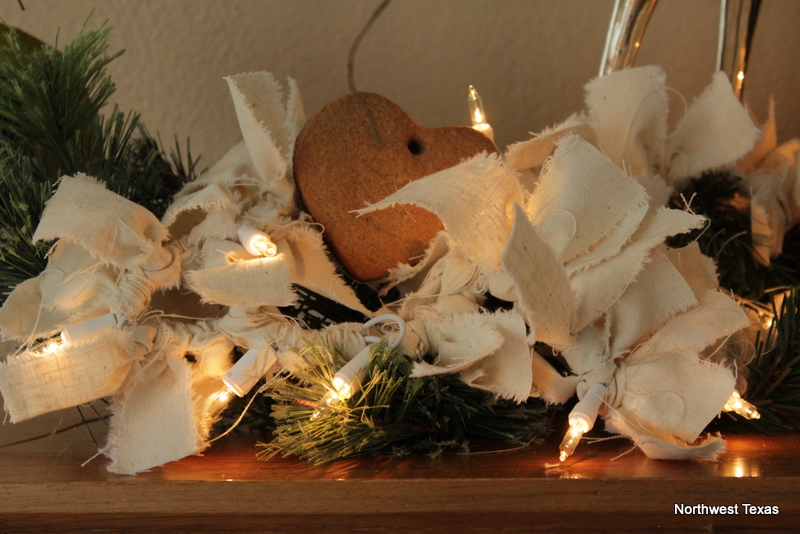
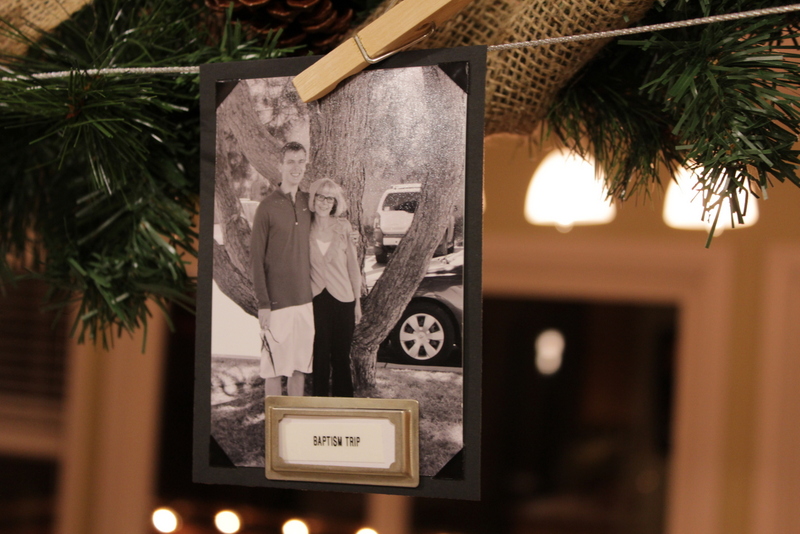
Yesterday I found a cute little package of gingerbread ornaments on my front porch.  They had been delivered by a sweet friend.  So I nestled them into my garland.

Thank you Holly for such a wonderful idea.  I love my mantle more this year than I ever have.


Christmas is but a few days away.  I hope your heart and home are ready.

Warm wishes!

Linking to SNS at Funky Junk Interiors.

Photo Garland


Here is another of my favorite projects from this Advent season.  This is a modification of a garland that was posted on Dear Lillie last year.  I bookmarked it in hopes that I might be organized enough this year to create one for myself.

The success of this project depends upon the details~

I really like the wire cable I purchased by the foot from Lowe's.  It hangs just right with no slack.  It looks just a tad industrial, which for some reason I'm attracted to, and it was just $.27 per foot.  And I especially love how my husband created the loops in each end of the cable because it looks so finished.  Lowe's also sells the little metal pieces for crimping, which I hope you can see in the below photo.


I used color digital photos from the past twelve months, but I modified the color saturation using Picasa so that the photos are now black and white.  I had to upload them to a photo processing website,  MPIX,  in order to have them printed as 3.5 X 5 inch photos.  I was hoping to achieve a retro look; a sort of old photo album feel that was so prevalent during the first half of the prior century.  There are not very many places to get this size print anymore but MPIX provides a myriad of size choices.

The photos are mounted on basic black card stock.  I followed Dear Lillie's lead and used photo corners, and I especially like the metal bookplates with little labels that remind us of the date or event of each photo.  


I think this string of photos looks better hanging in front of this green garland than it would have hanging alone or against a less festive background.  I chose to use only one clothespin per picture because I felt it was a little more tailored.  I didn't want the clothespins to be a focal point, but rather the photo itself.

My garland of memories is hanging above the kitchen sink.  We spend the most of our holiday time in the kitchen, right? At least for us, the kitchen is the heart of our home so it's the best place to showcase special memories.

Thanks for having a look!  Sending tidings of comfort and joy...

Linking to: Metamorphosis Monday at Between Naps on the Porch.


Wednesday, December 19, 2012

Romance Novel Wreath


I have two Christmas decor projects new to this year that have made me especially happy. The first is my repurposed (free and somewhat seedy paperback) book page wreath, which I am proud to share today.

I found some random giveaway books at our local quilt shop.  (The content of the books appears to be a little less wholesome than the quilt shop's image).  However, I am so happy to have found these particular novels because one of the paperbacks is appropriately yellowed.  My wreath has a comfortable and attractive vintage feel thanks to the aged condition of the books.


I began by wrapping 1.5" strips of burlap around my wreath.  The next step was to punch out the book pages and I used a 3" diameter scalloped punch.  This is not a hard wreath to make but it is labor intensive.  I spent the better part of a day working on it.  This represents many hours of 'punch and glue'.  However, I set my iPad on the table in front of me and happily streamed a variety of British TV via Netflix while I worked.


Despite the fact that I burned myself severely with the glue gun a couple of times, the wreath was well worth the effort expended.  It blends nicely in my mostly-neutral decor and it's perfect as an all-winter-long-accent.  

Remember~ coupons, coupons, coupons.  A coupon for the 3" punch and a coupon for the wreath.    And as I mentioned, the books cost nothing.  My time was the biggest investment.

Cheers!

Linking to Wow Us Wednesday at Savvy Southern Style.


Monday, December 17, 2012

Easy Advent Candles


If you, like I, enjoy decorating with neutrals and naturals, you might want to try this easy-to-follow Advent candle project.

To begin with, a shopping list: I bought a case of 12 pint sized Mason jars at our local Ace Hardware, and one carton of Epsom salts at Walgreen's.  In addition I bought a yard of muslin from Walmart for less than $2.  I found tea lights at Dollar Tree.


To get started, I tore the muslin into 1/2" strips, length wise.  If you don't like the selvage edge just tear it off too.  You will need half as many strips as the number of candles you are making because you cut each strip in half. OK, so I'm serious.  Cut a tiny slit in the fabric and then, "let her rip"!
 Raggy is good!

Take the lids from the jars and store them for future use.  Then tie a strip of muslin around the mouth of each jar.  I used a very casual square not.  The idea is to create a relaxed look so don't worry about making the knots perfect.

The next step is to fill the jars partially with the Epsom salts.  Just fill to a level that is pleasing to you, and drop a tea light candle into each jar.


To make the tags and the numbers I used a die cut machine (Cricut).  But you could alternately buy shipping tags from an office supply store and number them with a marker (my printing is not that good).

I have only days 20-25 on my counter because our son will be home during that week.  My plan is to read an Advent scripture each night and then light the corresponding candle.  On Christmas night, all 6 will be lighted.  But imagine how beautiful it would look to have an arrangement of all 25!


Do I have the world's tiniest creche?  Perhaps, but I love it.

Blessings~